Featured

My Saxophone Journey

My saxophone journey began at the start of semester two of 2019 at Melbourne Uni as a part of my Second Instrument study. During this unit, I have been creating weekly videos of my progress on the alto saxophone, learning under the guidance of Dr Carol Johnson, who has been very patient along this journey! This website blog forms the last assignment for this subject.

Self Reflection on my progress and learning

When I first started learning the alto saxophone, which is in Eb, I noted that one of the big challenges I was having while playing a transposing instrument (I have absolute pitch), was that of hearing everything in concert pitch, while trying to learn the note names e.g. hearing the pitch of a concert Bb while having to read it as an G.

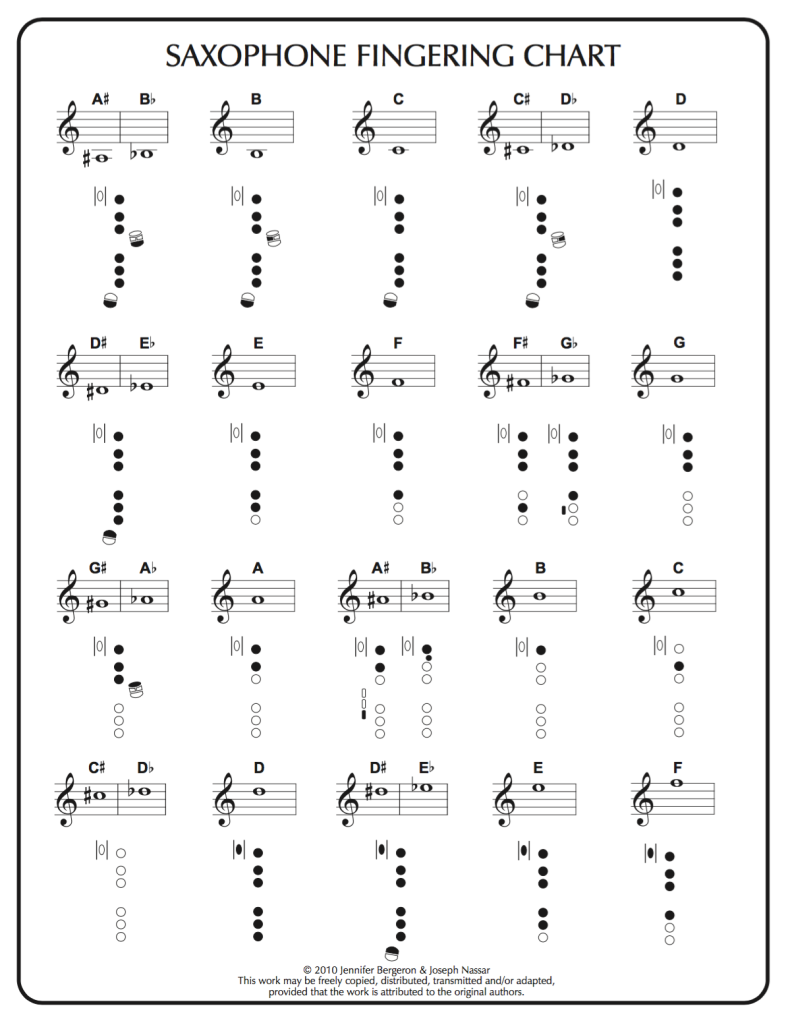
With flute being my main instrument though, it has been easy to learn the finger positions, which are very similar to the alto saxophone. But because the flute is my main instrument, I have noticed that I have been moving my jaw between registers on the alto saxophone, which is a no-no, as it all comes from the throat and breathing. So going from moving my jaw to not moving my jaw has been another challenge in regards to the sax.

Besides the tongue, the majority of the sound changes (register jumps etc, come from the throat)- Carol noted that I needed to create that I’m about to swallow when going from B to D (the break).

The great thing about the weekly videos and the three week video submissions to Carol was that we received feedback on our progress and pointers on the things that we could improve on. One thing I remember Carol noticing that I was moving my whole thumb when shifting to the octave key (in one of my journal videos ), which was affecting the shape of my left hand and the placement of my fingers over the keys. I found it much easier to just move the tip of my thumb, which didn’t affect the position of my left hand at all!

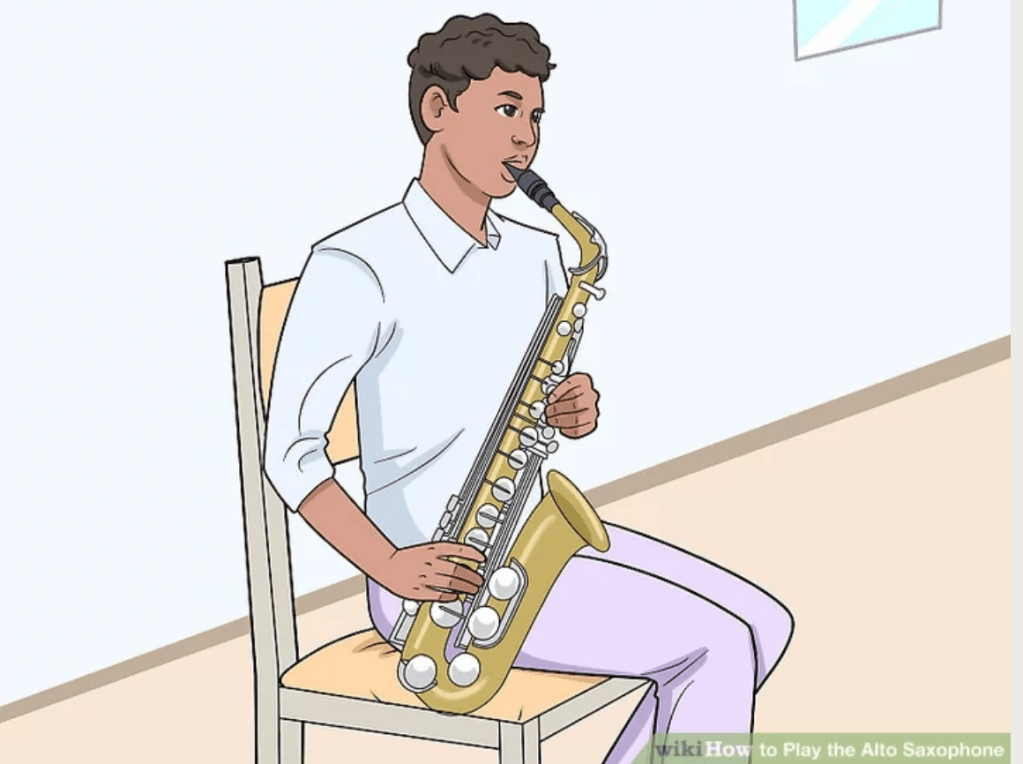
By also letting most of the weight of the instrument sit on my right-hand thumb, I was more able to hold the instrument comfortably without feeling as much pressure on my neck or back.

In regards to tone, It was noted that I had a nice open sound on the B. I practiced by playing that B and feeling the sensation of what it felt like (what i was doing physically to get that open sound with the throat etc). I then played the A, aiming to obtain the same open sound I achieved on the B, then added the G. Doing this has helped my embouchure to develop and to become more consistent and set.

Note reading has been quite easy for me, since again, the flute notes and the saxophone notes correlate for the most part. I find some of the fingerings more awkward, e.g. playing the G# (I keep pressing the side key by accident when I try to add the left-hand pinky key, but I know that is due to me tensing up and also moving my left hand too much. Also moving quickly from the G# to another note is a bit tricky at times.

With tonguing, because I’ve already been preview to tonguing on the flute, I’ve been finding it ok, making sure that I’m tonguing against the roof of my mouth. I’ve just been experimenting with different vowels/syllables like Too, Dah, Doo.

Overall, I feel that I am becoming more confident with my playing, and am finding it easier to move between the registers, along with being able to hold the saxophone with more ease for longer periods of time.

Holding the Saxophone

On finding the right neck strap

Go for a Y neck strap, and not for neck straps that are narrow and or have a cushion.

The strap needs to be adjusted to that the mouthpiece is in line with your mouth, not too high or not too low, so you don’t have to manipulate your body to put the mouthpiece into your mouth.

Also make sure the next strap is in a comfortable spot – Be sure to stretch before you play! (it is quite a weight on your shoulders- make sure that you also have good support and posture).

it is important that the strap is taking the weight of the saxophone and not your hands.

On holding the saxophone

Reference: Corey Randles

Start with the Right hand thumb hold (underneath ) then the Left Hand thumb underneath the top button.

The saxophone should be held either to the right of your body or in front of your body.  (when sitting, it’s easier for the saxophone to be to the right of your body. )

Vibrato- Getting started

Unlike vibrato on the flute or violin, vibrato on the Saxophone requires the use of one’s jaw to create the wah wah sounds.

Take your hand and place it under your chin- and say Wah wah wah wah etc  (to feel the motion that your jaw will be making when you are playing vibrato).

Everything else stays the same- your embouchure, throat position and air  (the jaw just moves up and down (wah wah wah etc). 

Practice the vibrato with a metronome 🙂

To listen to different variations of vibrato- 

  1. Johnny Hodges (Deep’s blue- fast and wide vibrato)
  2. Cannonball Adderly- Stars fell on Alabama- Fast and narrow vibrato
  3. Dexter Gordon- Guess I’ll hang my tears out to dry- Slow and wide vibrato 

Reference:

Additional resources

Online resources

Learnsaxophoneonline (You can sign up for a free account!)

Edsaxschool (this is youtuber Dr Selfridge’s website, which offers free handouts, practice exercises and saxophone lessons).

Bettersax

This gives you a free 6 part course on how to learn to play the Saxophone by ear, using the first five notes.

8notes

I absolutely love this website as it not only has free sheet music from beginner to advances levels, it also has free playalong jam tracks which you can have fun improvising to.

Habits of Musicianship

This is a really great beginner band program created by the Center for Music Learning at the University of Texas at Austin, which focuses on learning by ear at the start, and includes video examples for each instrument, a teachers book, pieces for each instrument, and plus, it’s all free!!

E.g of one of the beginner pieces from the program.

Books I’ve been using and recommend (for both students and teachers)

The Art of Saxophone Playing

Essential Elements for Band (Eb Alto Saxophone Book 1)

Learn as you play Saxophone

A Dozen a day Saxophone (really fun pre-practice technical exercises with cool backing tracks!)

Tune A day for Alto Saxophone (book 1)

Setting up your Saxophone

Setting up the instrument (tips and tricks from Dr Carol Johnson)

  1. Open the case (making sure it’s facing the right way up!) Also be sure that you already have your neck strap on in advance.
  2. Make sure the neck is in it’s pocket area- the mouth piece can go in the bell if there isn’t enough space for it in the pocket
  3. Take the mouthpiece, push the ligature up a bit away from the mouthpiece, grab the ‘bottom’ (butt) of the reed and slide it through the ligature, lining the reed up ‘a hairline’ from the tip of the mouthpiece. You can check this by pushing the top of the reed down with your thumb to check the distance.
  4. Push down on the ligature, making sure it’s around a 1/2 centimeter down, then tighten the bottom lug first, then the top lug.
  5. Hold the neck in your left hand, and gently twist the mouthpiece into the neck. (Make sure that you’re not putting your hand over the octave key).
  6. Hold the neck with your right hand, and rock it gently into the body of the saxophone, making sure that the octave key is lined up with the neck of the saxophone.
  7. Tighten the lugs- first the left, then the right lug (lefty=loosy, righty=tighty)
  8. Attach the neck strap to the circle (towards the lower end of the saxophone and adjust if necessary)
  9. You should be ready to play!

Packing up the instrument

Do the opposite! Neck twists off (loosen the lugs first of course), then pop it in the case so it’s safe.

Lift the saxophone body with the bell, while also holding the top end of the saxophone for support (without touching the keys).

On cleaning the saxophone

Put the octave key protector on, then pop it back in the case- after you have cleaned it!

Be very careful when taking the reed off the mouthpiece and putting it back into it’s plastic case, the tip of the reed can easily get damaged.

Dr Selfridge Music also has many fantastic and easy to follow video tutorials on youtube-

This one below is on how to put the whole Saxophone together.

Here is another great video, by Corey Randles; worth taking the time to watch (it is long though!)

Saxophone Embouchure

Here are a few quick steps on setting up a good embouchure for the Saxophone

Reference ‘EdTheJazzMan‘ Dr Carol Johnson

  1. Hook the bottom lip over your bottom teeth (the lip goes over the teeth), just turning it out, ever so slightly (the bottom lip acts as a cushion for the reed to sit on). We want to avoid resting the reed on our teeth (it will make a bad sound)  The reed should be resting on the soft fleshy part on the inside of the lip.
  2. The reed then sits in the middle of the lip- parallel to the floor (and rests on the cushion of the bottom lip)
  3. The top teeth then rest on the top part of the mouth piece, around a 1cm gap- (You should not be biting with the teeth and or have any sort of pressure on the mouth piece)
  4. All the gaps formed in the rest of your mouth need to be sealed- the air that you blow just goes down to the centre of the mouth piece- we don’t want the air to escape through the gaps in our mouth.
  5. Then we need to relax the bottom jaw (you can say ‘GA’ like a baby to help release any tension) before you blow, and raise the cheek muscles (e.g. imagine biting into a lemon)- the tension needs to come from the cheeks. 

(Three stages of setting up the correct embouchure)

  1. Lip
  2. Teeth
  3. Closing of gaps

Practice and experiment with the variables – the lips, the jaw, the cheeks, plus the breathing exercises

If you’re ever struggling, put the instrument down, breathe in and take a little break- it will make a difference. 

Register jumps

To be able to move between the registers more freely and easily, work on purposely splitting the note without using the Octave key.

When using the Octave key, make sure that you don’t move the whole thumb; it can throw the rest of the fingers out of position over the other keys.

Just move the tip of the thumb- keeping the left hand nice and round, thinking of turning a doorknob!

If the air is too squished/restricted or you’re finding it hard to get the notes out, and you are hearing squeaks, the bottom lip might be too tight- relax the bottom lip more.

If you’re only hearing air, then you may need to add a bit more pressure from the bottom lip (jaw)- the bottom lip should be there as a support. The cheeks provide the strength.

I received good advice from Dr Carol Johnson, in that of making sure the Jaw Position is set- it doesn’t move at all (unlike in flute playing).

The tongue moves; and the majority of the sound changes (register jumps etc), come from the throat. Make the motion of pretending that you’re about to swallow when going from lower to upper register notes (Experiment), and specifically, from B to D (the break on the instrument).

Design a site like this with WordPress.com
Get started